Since the latest update (version 1.1.30993.107) of Customer Insights Journey, there is a function I have been waiting for: Create leads and sales opportunities in a journey. Previously, I had mostly rebuilt this with a trigger in an complicated way. Now, however, the element can be inserted at any point in a journey. It creates leads or opportunities. And similar to tasks or phone calls, details like owner of the record, topic or description can be included. But I was wondering how to add other data to the newly created lead. And most importantly, how can a marketer define this individually per journey. I’ll show you the default first and then how we can easily extend it.
But first please excuse the weird German/English mix in my screenshots. The translation in my trial did not really work out well. So a little German lession in the beginning: Kontaktverlauf means journey 😉
The Default: Create Leads in Customer Insights Journey
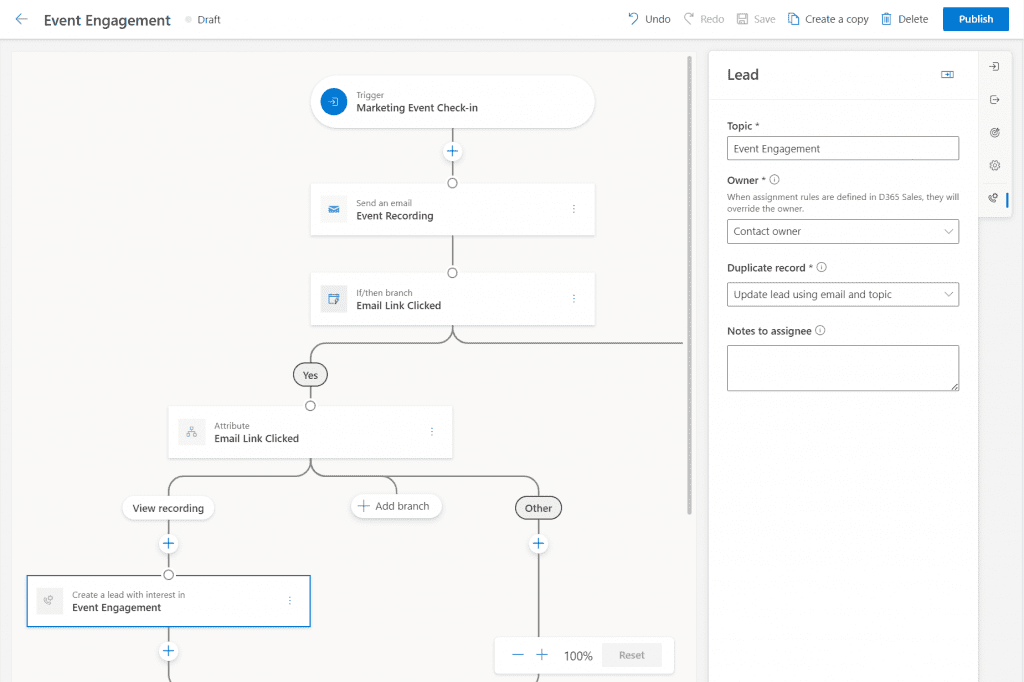
Let’s start with the default and let’s use the popular event registration as a use case example. I don’t want to create a lead for every registration, but only if the contact has also looked at the recording again after the event. In the Journey, I can add the Create Lead element. I can then specify what the subject, owner and a description of the lead should be. For the owner I can choose between the options: Contact Owner, Company Owner or a specific User or Team. If you use the lead assignment from Dynamics 365 Sales, this will overwrite the owner from the journey.
Lead Matching Strategies in Customer Insights Journey
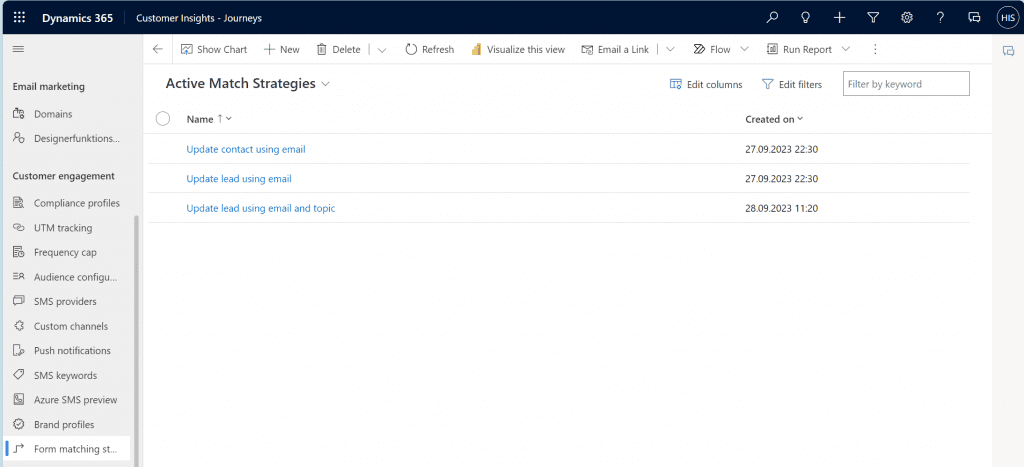
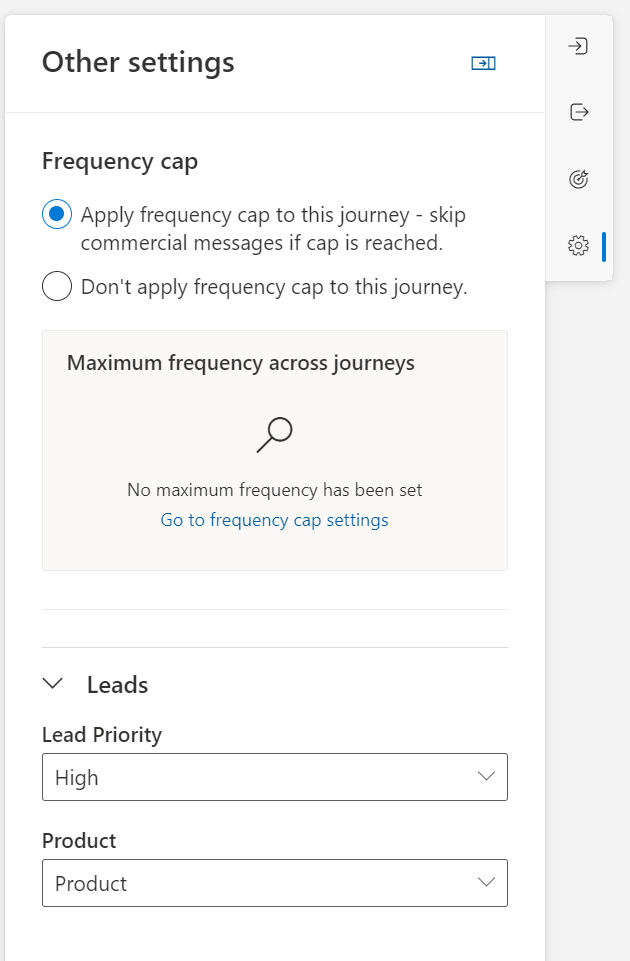
An important topic is the duplication of the record. You can decide whether to create a new lead each time or update an existing lead. There is already a default rule. If the system finds an existing lead with the e-mail address, it will be updated instead of creating a new one. However, there is also a possibility to create your own duplication rule. This is very similar to the logic used in outbound marketing. You can find the setting for this in the settings. I have created a rule that only creates a lead if there is not already one with the same email and the same topic.
The extension: Fill more fields of the lead
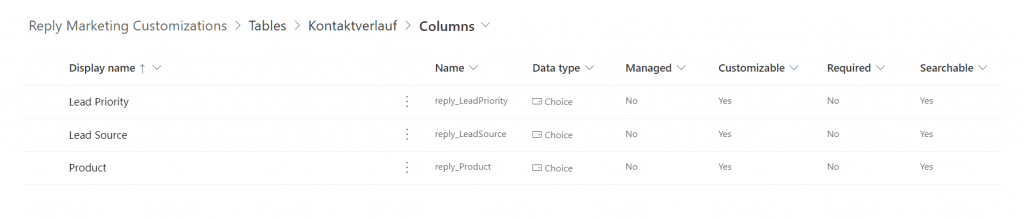
What I also miss in this element for lead creation is the ability to populate more fields on the lead. The standard fields of subject, owner and description are often not enough. For example, I also want to define the lead’s priority and product of interest in the journey. And fortunately, the journey designer can be extended with fields.
First, I create the fields that have to be filled in additionally during the lead creation. I create these fields in the journey table. But if they don’t exist on the lead yet, you should add them there as well of course.
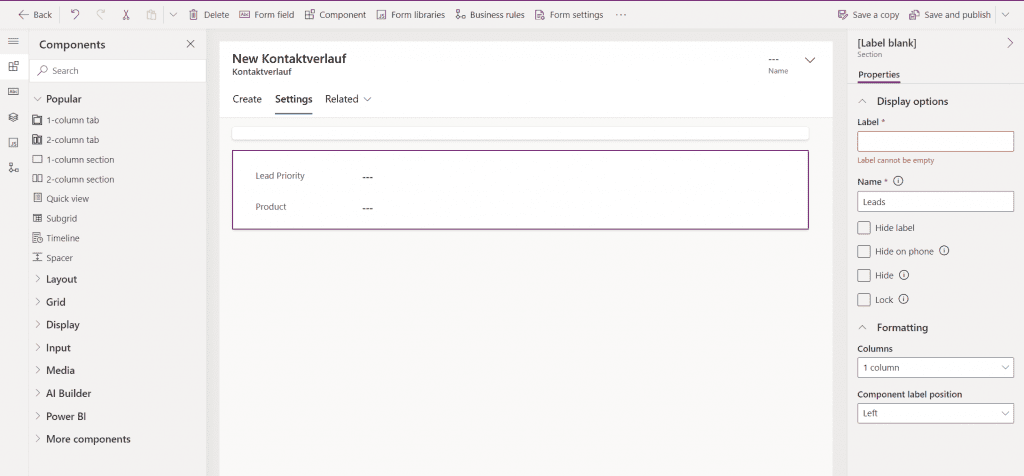
Then I add the fields on the Journey Designer form. For this I use the main Journey Information form. In this form you can find the Settings tab. And there you can add a new section where the fields can be inserted.
After publishing, the fields appear by the small gear icon in the journey. For each section you create on the journey form, a small drop-down area with the corresponding fields appears in the journey settings. This way, an employee can define for each journey which values should be passed to the lead. For this to work, however, I create another PowerAutomate that updates the lead with the fields.
PowerAutomate updates the lead
I want the PowerAutomate to update all leads that were created through a journey. Therefore I start with the trigger When a record is created for leads. Additionally I add the filter _msdynmkt_customerjourneyid_value ne null. This means that the lookup field must not be empty, so a record must be linked. I then query the information from the journey. Make sure you choose the right table for the Row ID. Especially if you are still using outbound marketing. Real-time marketing tables can always be identified by the prefix msdynmkt.
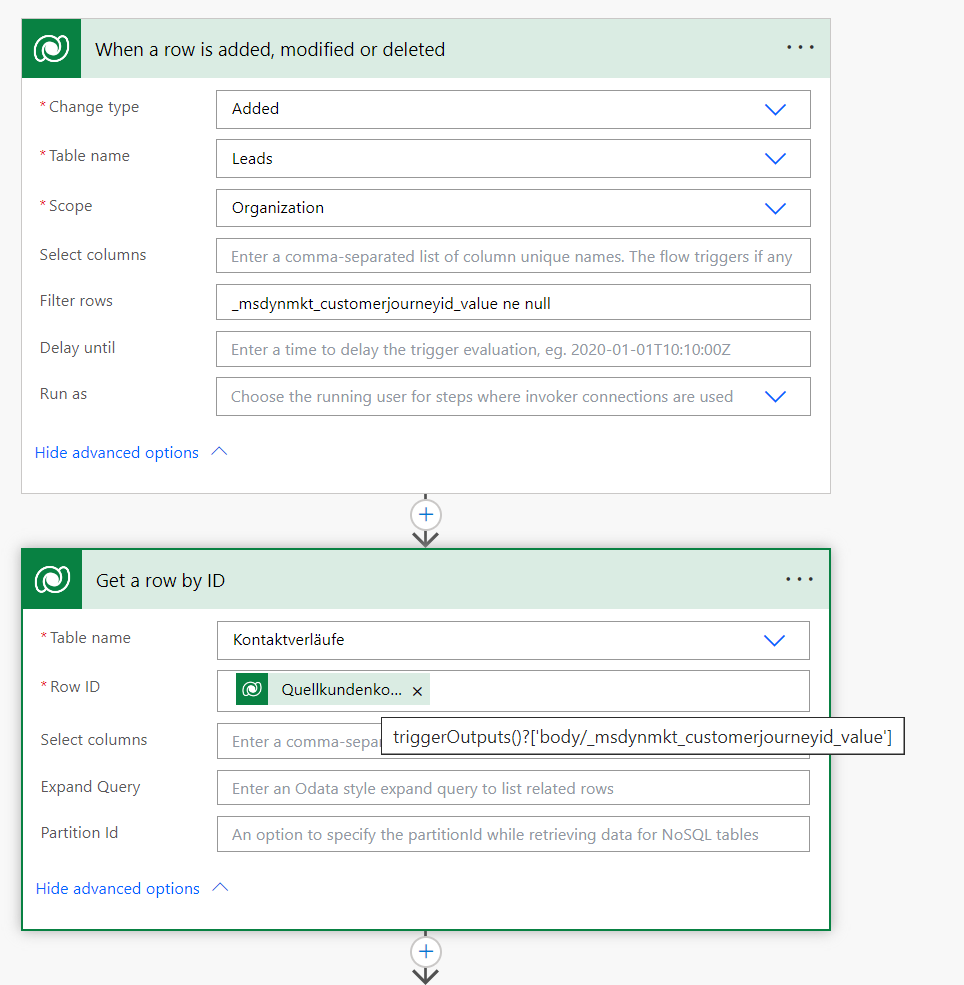
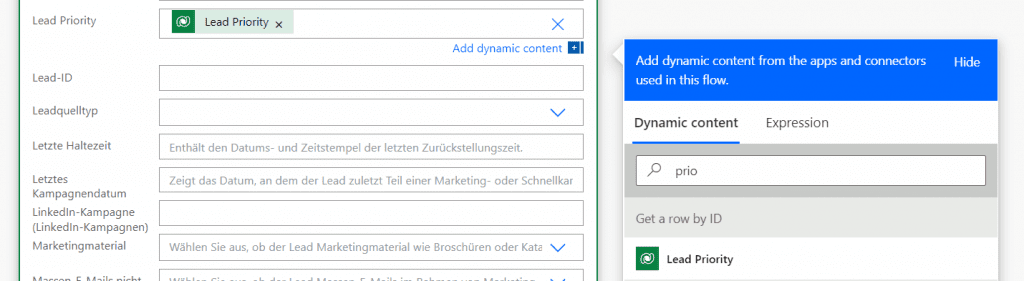
In the next step, I update the lead with the values from the journey.

Summary
By default, we now have the ability to create leads in a journey at any point. If additional lead fields should be filled automatically, we can do this via fields on the journey and a PowerAutomate. This has the great advantage that we don’t have to build a fixed flow, but can decide for each journey which values should be stored in the lead. And marketers can define this themselves and don’t have to ask development for a new flow for every use case. Me likey 🙂
***Please be aware: The content is accurate at the time of creation. It may be that Microsoft has made changes in the meantime.***
Check out the FAQ section of my blog as well: Short questions with quick answers! Go to FAQs
2 Responses
Super useful thanks. Could you please help with a screenshot of this step “Then I add the fields on the Journey Designer form. For this I use the main Journey Information form. In this form you can find the Settings tab. And there you can add a new section where the fields can be inserted.” as I am not seeing a settings area in the journey information main form. Thanks.
Hi Jo, thanks for your feedback! You can find the screenshot below the text. It shows the form editor for journeys. In the middle of the screen you can see the settings tab where you can add the fields to a new section.
Do you have the latest version of the marketing module? And do you use the main form of the real-time journey (msdynmkt_journey)?