Okay, dear readers, March and therefore MarTech March is over. But I’m not done with my ideas on AI and marketing automation. So after MarTech March comes AIpril. And I still have a small use case for a sentiment analysis with the AI Builder in Customer Insights Journeys that I don’t want to withhold from you. How cool it would be to determine at an early stage whether a customer is reacting favorably or negatively. Depending on the result, I can design the follow-up action and journey completely differently and much more individually. I can also assign users to contact the customer more precisely based on the sentiment. This way, the customer also feels that they have the right content at the right time – classic marketing with an AI twist.
Create a sentiment analysis with PowerAutomate and the AI Builder
Let’s take the following example: The customer answers a contact form. It contains free text fields, which he fills in with a longer message. A PowerAutomate with the AI Builder analyzes the text field and stores the result in the lead so that the user can see it directly.
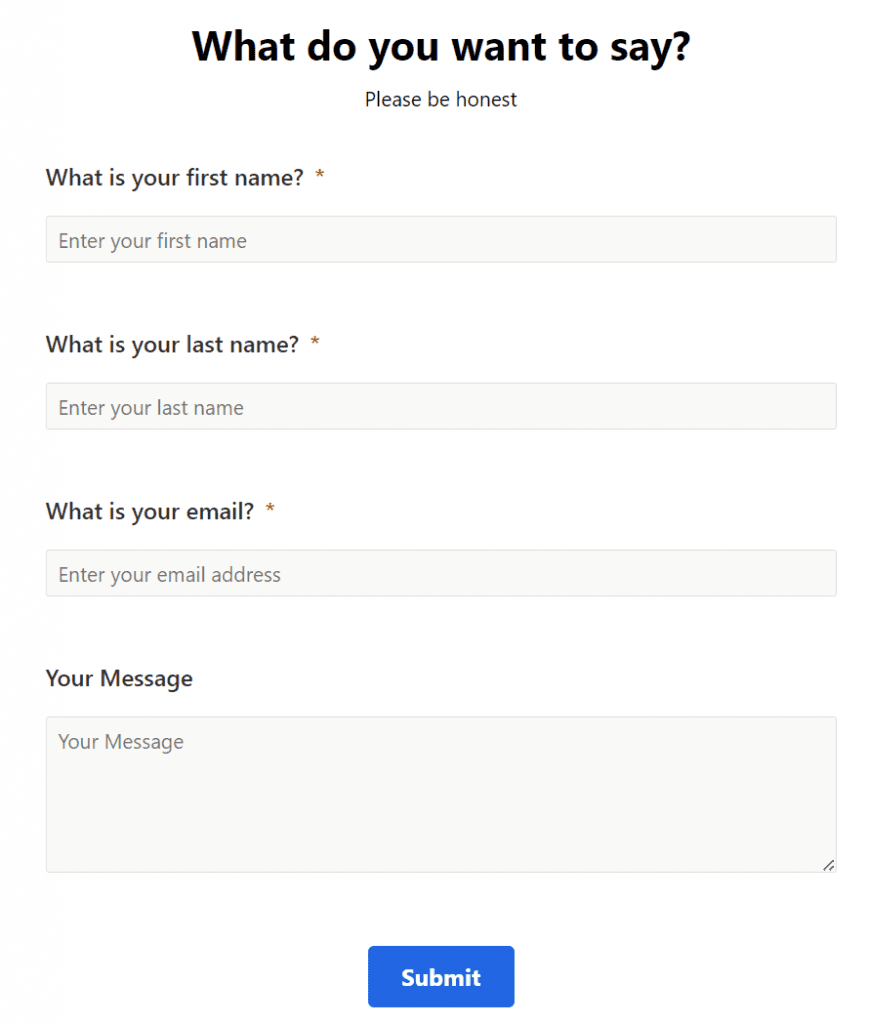
Create a marketing lead form and lead fields
This is the most straightforward part of the process. I use a normal marketing form for leads, on which I add lead fields and a “Your message” field. For the latter, I have a separate multi-line text field on the lead table. The technical name is pau_yourmessage. I also create an option set on the lead that contains the values Positive, Neutral, Negative and Not clear. I fill this later in the PowerAutomate with the result of the AI.
Create PowerAutomate for field transmission
But let’s start with the PowerAutomate. I create an automated flow that always starts when a new field submission(msdynmkt_marketingfieldsubmission) is created. However, it should only start for submissions of the message field. In the Field submission table, the technical name of my lead field created above is in the msdynmkt_name field. So I add the following filter:
msdynmkt_name eq 'pau_yourmessage'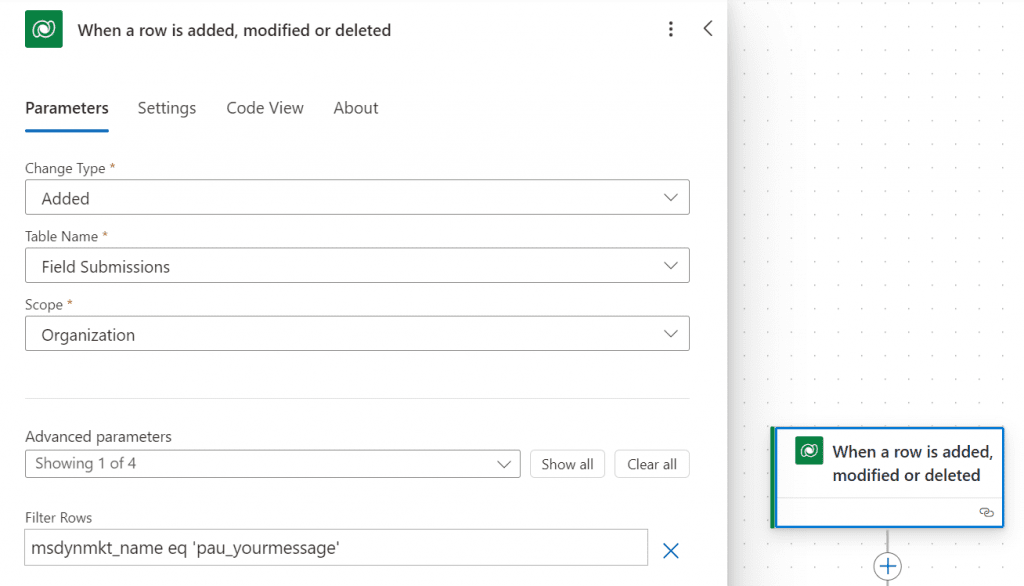
In the next step, I add a waiting time of about 2 minutes. Why am I doing this? When the system creates a form submission, the system also searches for a suitable lead or creates a new one. This can take some time until the submission has the status successful. But 2 minutes waiting time should definitely be enough. I then search for the appropriate form submission, there is a direct link between form and field submissions with the Marketing Form Submission ID field.
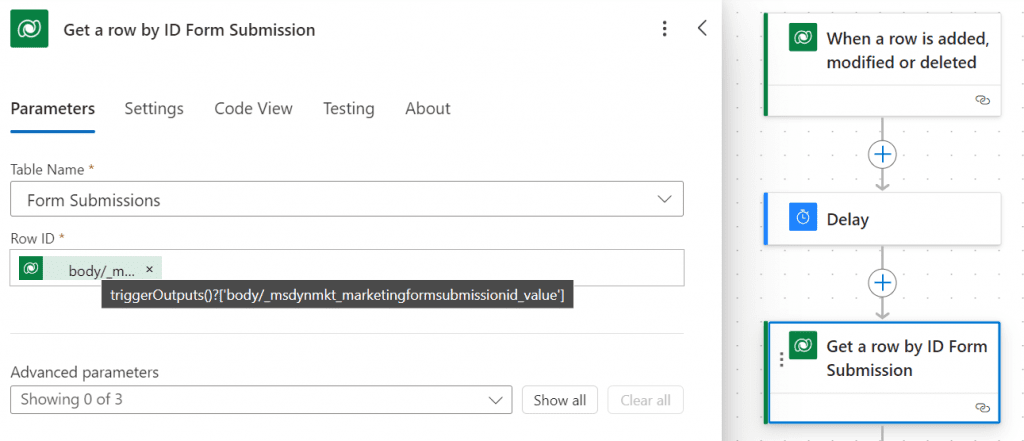
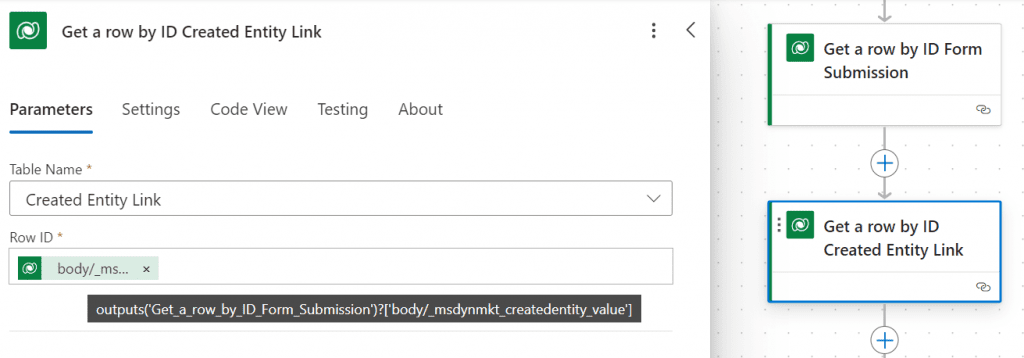
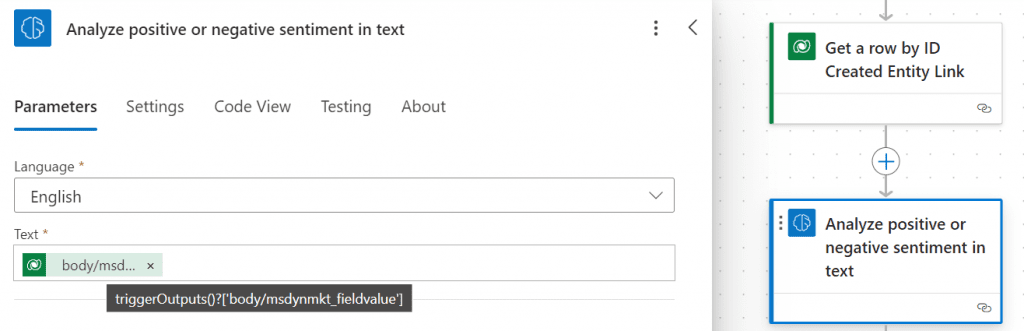
Now I need the connected lead that submitted the form. After all, I want to update the sentiment field on the lead later. In the form submission, there is a field called Linked Record. This field stores the lead record. But unfortunately it’s not that simple. When I use this field in the update step of the field, the flow strangely creates a new lead record. Which makes absolutely no sense!
I therefore found out that a separate table is hidden behind the linked record: Created Entity Link (msdymkt_createdentitylink). The correct lead ID, which we will need later for the update, is hidden in the Target Entity ID field.
The predefined sentiment analysis model in the AI Builder
Now the AI Builder gets back to business. There is a nice predefined model that can recognize positive or negative moods in text data. The ratings and labels can be “positive”, “negative” and “neutral”. The analysis also includes a confidence score. The value can range from 0 to 1. Values close to 1 show a greater confidence that the identified sentiment is correct.
In the AI Builder step, I set the field value from the field transmission. This ultimately contains the message left by the lead.
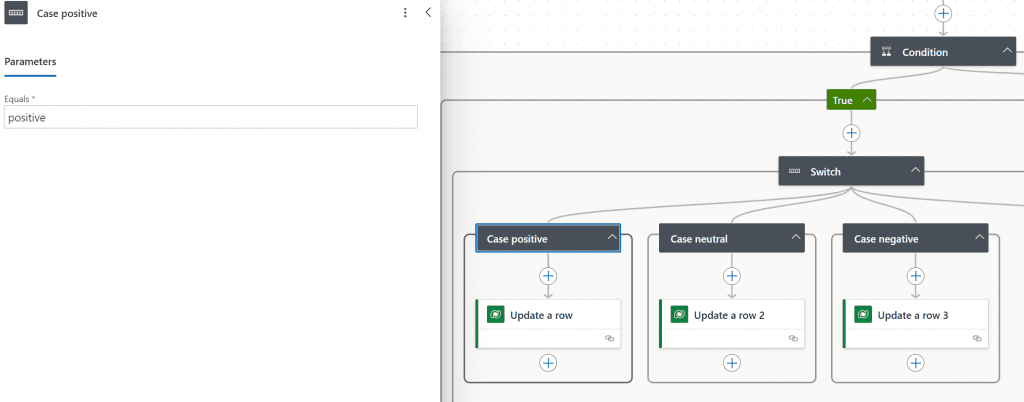
In the next step, I could actually update the option set sentiment on the lead with the result from the analysis. But this should only be updated if the confidence score also has a high value. That’s why I’m adding a condition. Only if the score is above 0.8 should the fields on the lead be updated to positive, neutral or negative. If the score is lower, the flow should go to the false path and set the option set to Not clear. The confidence score is shown in the three fields Probability overall text is negative, neutral or positive.

However, if the confidence score is high enough, the true path is activated. I then use the switch component to set the lead and the sentiment field to the corresponding value depending on the analysis result. So if the AI Builder parameter is positive, the flow runs into the path and updates the sentiment field to positive. I do the same for neutral and negative.
The entire PowerAutomate and the lead view for users
The full length of the PowerAutomate looks like this:
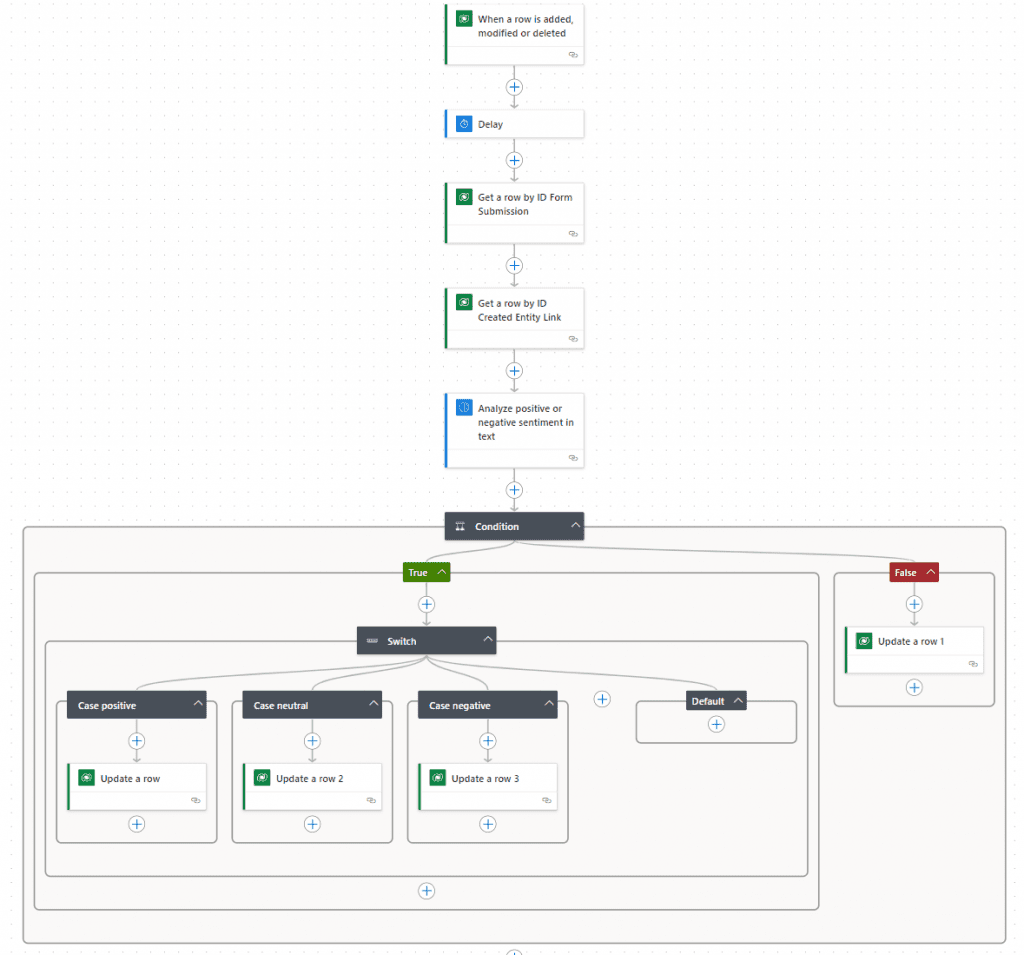
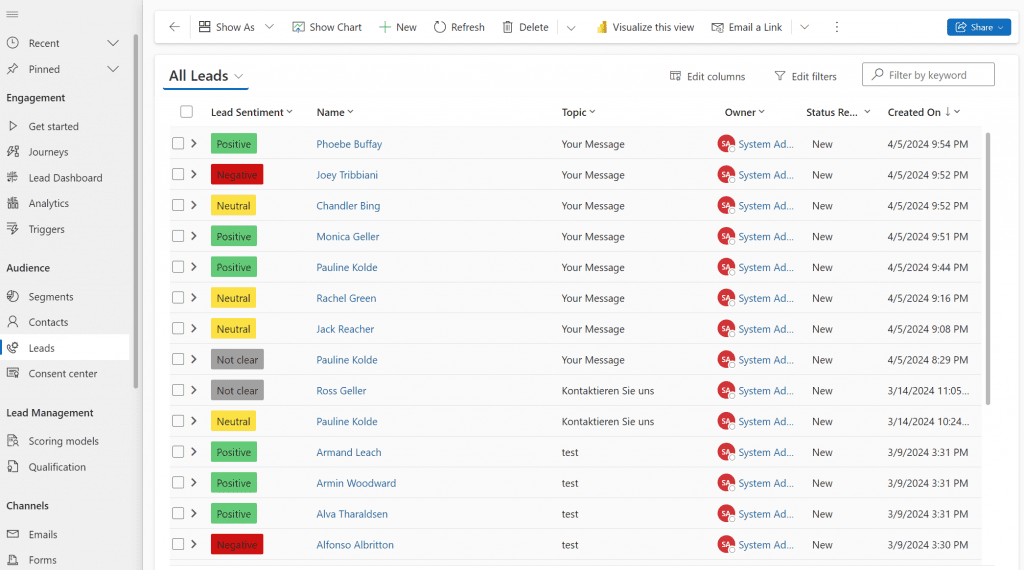
The flow therefore checks the message that the lead has left via a form from Customer Insights and then the AI Builder performs the sentiment analysis in the text. We then set the sentiment option set to the appropriate value. I have also adjusted the view for leads so that the sentiment is directly visible in the overview.
Summary
Sentiment analysis with the AI Builder in Customer Insights Journeys offers great possibilities that certainly go far beyond my use case. I can also well imagine using the model for social media, customer ratings, surveys or any text data. It is important to know that documents must not exceed 5,120 characters. Otherwise, the same AI Builder rules apply to this example as in parts 4 and 5, so check back there if you have any questions about the specifics. Have fun with creating even more ideas!
References: Sentiment analysis prebuilt AI model – AI Builder | Microsoft Learn
***Please be aware: The content is accurate at the time of creation. It may be that Microsoft has made changes in the meantime.***
Check out the FAQ section of my blog as well: Short questions with quick answers! Go to FAQs