· Pauline · How-to · 5 min read
Customize Double Opt-In in Dynamics 365 Customer Insights
Learn how to customize and personalize double opt-in emails and journeys in Dynamics 365 Customer Insights Journeys using real-time marketing.

Please be aware: The content is accurate at the time of creation. It may be that Microsoft has made changes in the meantime.
Customize Double Opt-In in Real-Time Marketing
Double Opt-In is now widely available in Customer Insights Journeys and real-time marketing. Setting it up is straightforward, but the default email can feel a bit impersonal. I want to make the email and the journey a little more special and personal. In this article, I show how to use the subscriber’s name and personalize the message.
This approach makes the confirmation email feel more relevant and engaging and helps build a positive first impression.
Customize the double opt-in email in real-time marketing
When enabling double opt-in in the compliance profile, the system automatically creates the email with standard content. Here is how to customize it.
Remove the {{OptedInPurposeTopic}} token (without breaking the email)
A standard double opt-in email is essential for managing user subscriptions effectively. It includes a personalization token, {{OptedInPurposeTopic}}, which dynamically displays the purposes and topics selected by the user on the sign-up form. The email also includes a button that links to Opt-in Confirmation to finalize the process.
Important
Avoid deleting the {{OptedInPurposeTopic}} token. The email cannot be published without it, and manually restoring the token does not work. If it is removed by mistake, you must start over using the double opt-in email template. I learn this the hard way and redo all my customizations.
If you prefer not to display the list of opted-in topics, there is a workaround. You can set the font size to 0 and the font color to white. This hides the text visually while keeping the token intact.

Attention
I recently notice that changing the font size to 0 does not always work. A reader also informs me that it does not work in Gmail.
However, there is a new workaround that does the job more reliably.
First, add the token to a new text section and assign a custom class:
<div class="hidden-element" data-editorblocktype="Text" style="margin: 10px;">
  <p>{{OptedInPurposeTopic}}</p>
</div>
Then add the following CSS to the <style> tag of your email:
div .hidden-element {
  display: none !important;
}
This keeps the token in place while completely hiding it from the email layout.
Add personalization to the double opt-in email in real-time marketing
A standard double opt-in email lacks audience-based personalization. The reason is simple: the recipient can be either a contact or a lead, which makes it difficult to use fields like First Name or Last Name directly.
There is, however, a useful workaround.
In real-time marketing, form submissions are saved before email confirmation. Unlike outbound marketing, this approach gives access to the submitted form fields, including values like First Name, assuming the field exists on the marketing form.
Use form submission field values
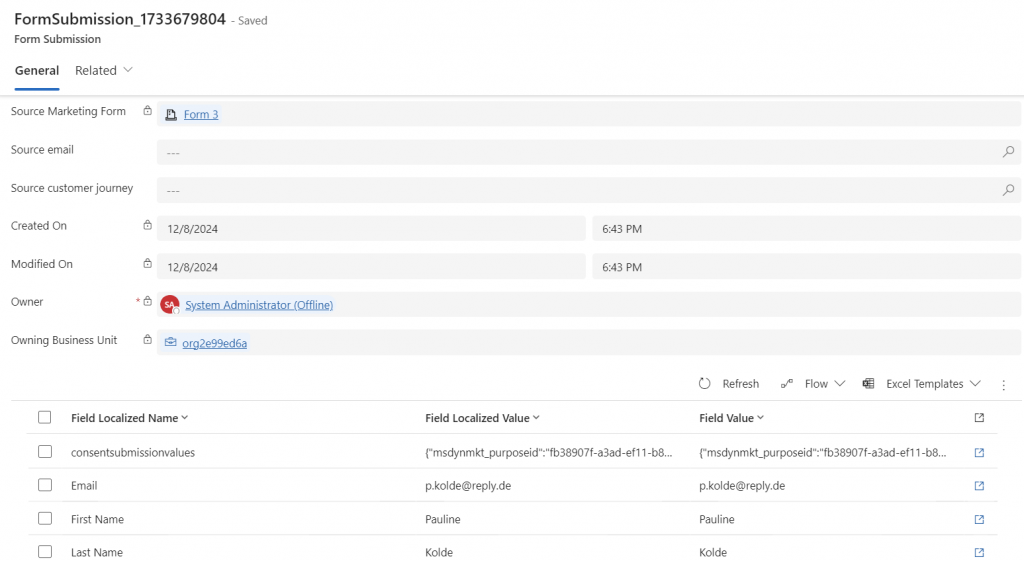
For each field on the form, the system creates one field submission record. When opening the first name field submission, it shows:
- Name: Technical name of the field
- Value: What the user enters
With this information, the First Name can be added to the double opt-in email using a list based on the field submissions from the double opt-in trigger.
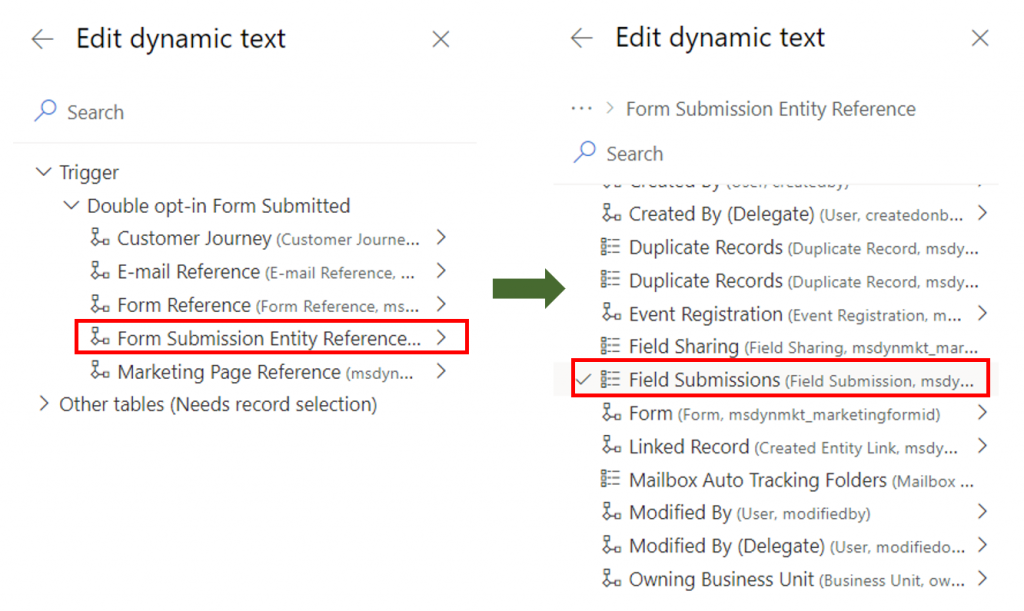
Add dynamic text as a list
- Add a list to the email.
- Filter the list to only include the field submission for the First Name field.
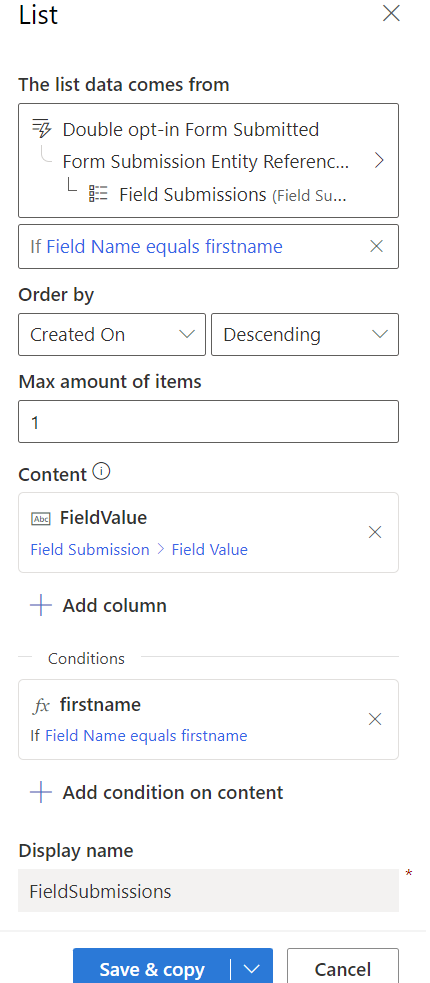
- Set the maximum number of items to 1.
- Select the column Field Value.
- Open the advanced options under the content field.
- Add a default value that displays when no data is available.
Adding a default value is important because First Name might not be included on all marketing forms or might not be a required field.
In the end, the list configuration uses field submissions from the double opt-in trigger and displays a single Field Value.
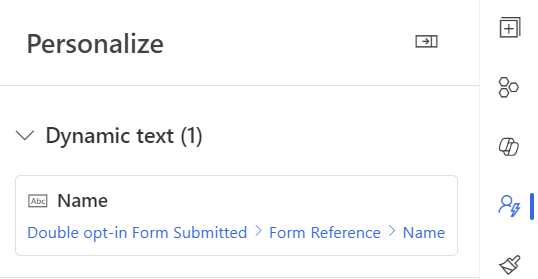
Using the same approach, additional information such as the form name can be added dynamically to the email.
With these trigger-based options, the double opt-in email immediately feels more personal.

Send a double opt-in reminder in real-time marketing
After personalizing the double opt-in email, the journey itself can also be improved.
A useful enhancement is adding a reminder for users who do not confirm after 2 days. In double opt-in journeys, the available actions are limited to:
- Wait time
- Attribute branch
Configure the reminder logic
- Edit the journey.
- Add a Wait time of 2 days.
- Add an Attribute branch.
- Configure the condition to check Status Reason of the form submission.
If Status Reason equals Confirmation pending, the user has not yet confirmed the double opt-in.

From this branch, the same double opt-in email can be sent again as a reminder.
Further options for personalizing the journey
- Additional personalizations: Use dynamic content like names or the form name to personalize reminder emails.
- Different paths: Create separate paths for different user groups based on submitted form information.
- Vary timing: Adjust the wait time depending on urgency or target audience.
What else would you add to make the double opt-in journey more personal? Share your ideas in the comments! 😊
Do you have questions, ideas or remarks? Feel free to get in touch.


