· Pauline · How-to · 4 min read
Extend Real-time Marketing Forms with tiny bits of Javascript
Learn how to enhance Real-time Marketing forms with tiny bits of JavaScript to conditionally show or hide fields like customer numbers based on user selections.

Please be aware: The content is accurate at the time of creation. It may be that Microsoft has made changes in the meantime.
For an update on this article and more Javascript in marketing forms, check out the Javascript library: Javascript library for real-time marketing form in Customer Insights
What I like about the Real-time Marketing forms is their modern designer and the fact that you don’t have to create a Marketing form field any longer. All form fields on the contact or lead are automatically a marketing field that you can use in the form designer. Even when you add a new field to these tables, it appears within seconds in the Marketing form as well.
Use Case: Show or hide fields based on fields input in the Real-time Marketing forms
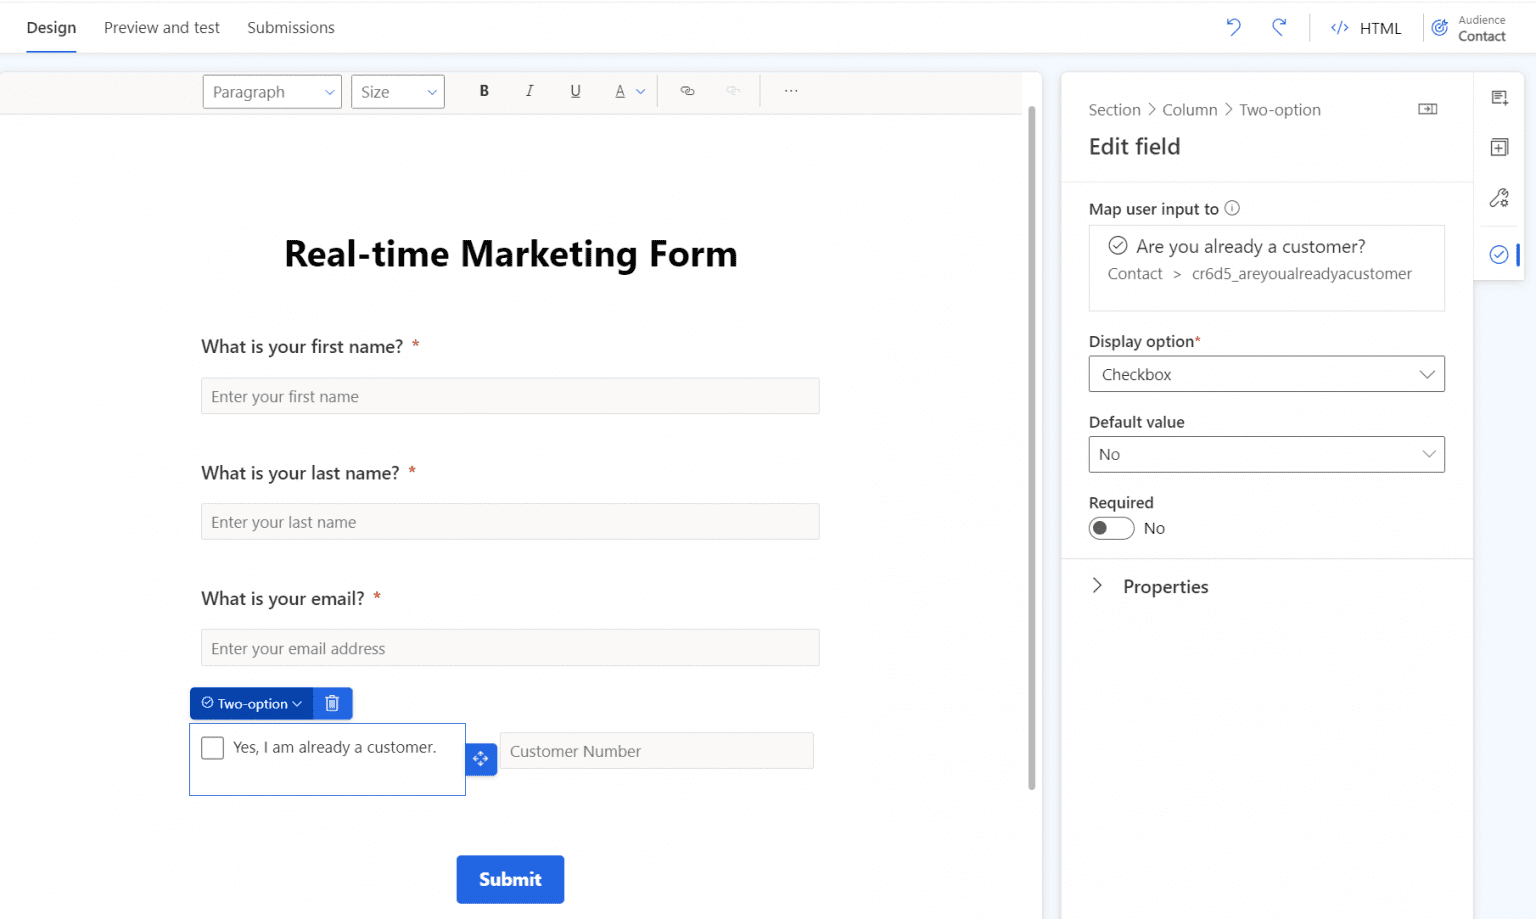
Sometimes we want to show or hide different fields based on what the customer is entering in another field. Example: We ask the contacts whether they are a customer already. And if yes, they should enter their customer number. Unfortunately there is no easy checkbox for that in the designer. So we need some adjustments and javascripts in the HTML.
Create Real-time Marketing form
First thing of course is the markting form. So in Real-time Marketing you create the form and add all necessay fields to the form, also the customer number field.
Find the correct fields
Fortunately, it is not necessary to add HTML or CSS with classes and IDs. It is enough to know the logical name of the field, because we add it to the script right away. You can find out the logical name either through the make portal or much, much easier, of course, directly in the real-time marketing form. Select the field you want to know the technical name of and in the button on the right side you will see the field you want to map and the technical name.
Ok, now let’s see how to add the javascript and display the customer number only under certain conditions.
Add the javascript
The script first defines which fields are used as triggers of our function, but also which field should then be shown and hidden. Before you insert the script, remember to change the logical name.
<script>
   let customer = document.querySelector('input[name="cr6d5_areyoualreadyacustomer"]');
   document.querySelector('input[name="cr6d5_customernumber"]').style.display = 'none';
   customer.addEventListener('change', showCustomerNumber);
   function showCustomerNumber() {
      if (customer.checked === true) {
         document.querySelector('input[name="cr6d5_customernumber"]').style.display = 'block';
         }
     else {
         document.querySelector('input[name="cr6d5_customernumber"]').style.display = 'none';
          }
     }
</script>
The script first defines the customer variable where we set the checkbox field. Then it first hides the “Customer Number” field, because it should only be displayed when the checkbox is checked. And then it “listens” for the change of the customer field and executes the function. There we first check a condition - is the customer field checked (true), or not. In our case we want to show the customer field only if the previous field is set to “yes”, but many other actions are possible, e.g. that the field should also become a mandatory field. We also add an else-condition, so that the field is hidden again if the checkbox is empty.
Now go to the HTML code of your form. You will find the button in the upper right corner of the designer. There we can insert the script. You can now place the javascript somewhere inside the tag. I usually add it right to the end, so before the tag. Don’t paste the code into the section, the form editor will remove the code automatically and without warning.
Important: When a form is live and you change something, like a field or the script, it can take up to 10 minutes until it is reflected on the form page!
Summary
- Use the script in the article and replace the field names with yours
- Add the
- Test your form
- You’re all set!
Unfortunately there is no Form Template functionality yet for Real-time Marketing. But for now, you can of course copy and paste the HTML code for future forms.
Do you have questions, ideas or remarks? Feel free to get in touch.


